I plan to use this
Week of Patching to explore
making visual (and possibly audio-visual) patches in
TouchDesigner[1]. Unfortunately, I didn't have as much time as I would have
liked to work on this today. This is kind of like my
"hello, world" patch for doing some kind of video
synthesis in TouchDesigner. First, here's a video of the
resulting output:
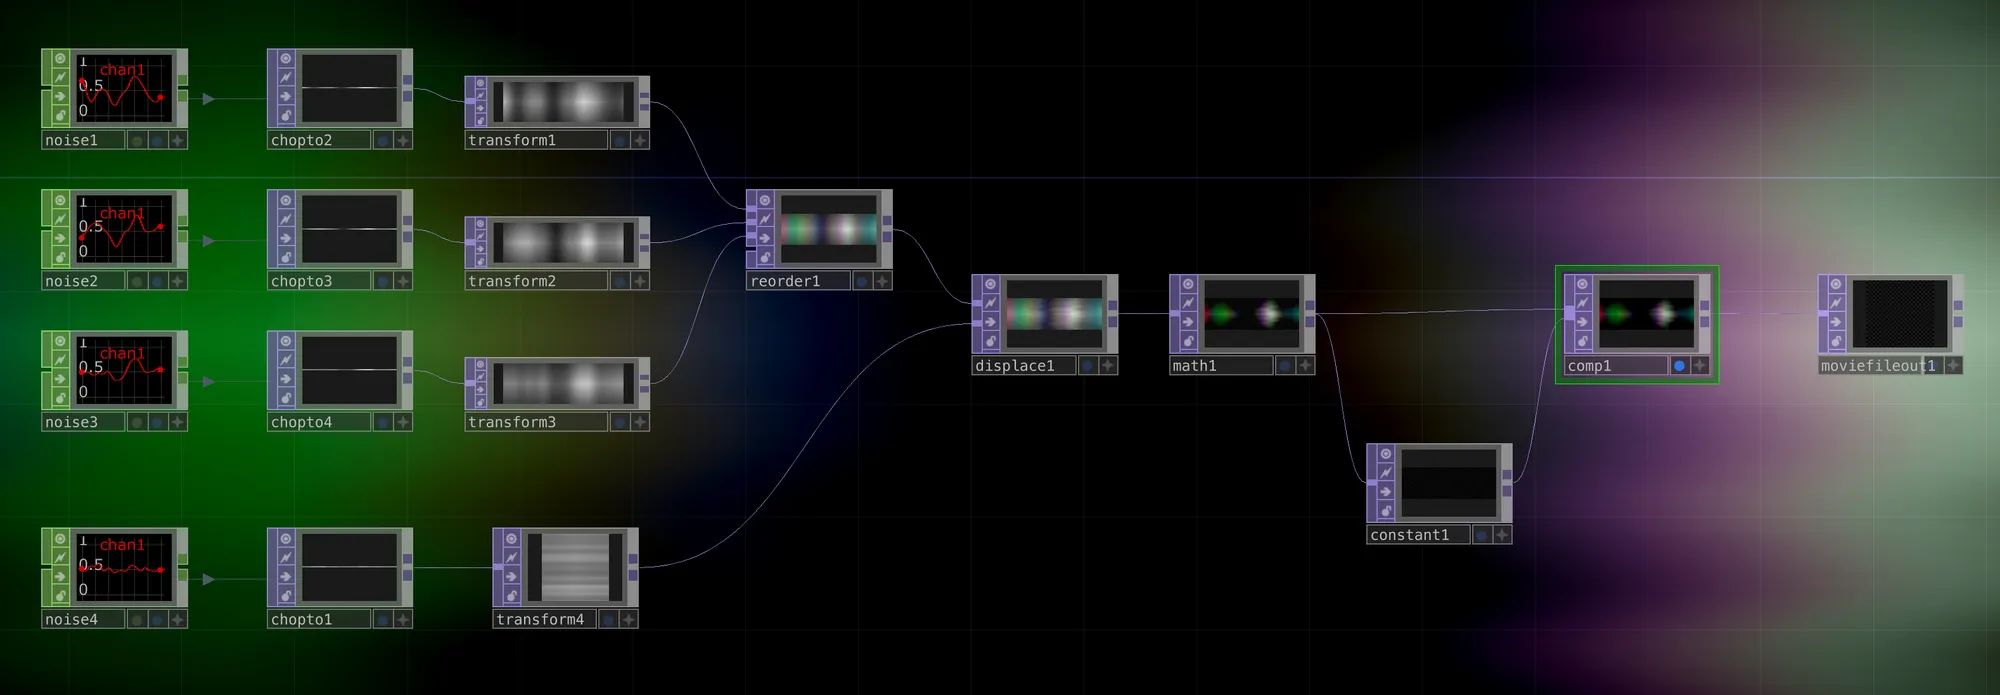
A screenshot of the patch (click to zoom):
And an explanation of what's happening:
I used four different "noise" CHOPs[2]
with different seeds to generate four different
one-dimensional arrays of randomized wiggles.
I animated the "translate X" parameter to make
them animated.
I then used the "CHOP to" texture operator[3]
to convert them to video streams, and
"transform" TOPs to stretch them from 1D to 2D
"noise fields".
I used a "reorder" TOP to take the first three
noise fields and map them to red, green, and blue of the
resulting video image.
I took the fourth noise field, which was rotated 90º, and
used it to "displace" the color image from the
other three, adding undulating horizontal wiggles to the
otherwise vertical bands of color.
I used a "math" TOP to decrease the overall
brightness, which also made the colors look more appealing
to my eyes.
I took a "constant" TOP, generating a black
video image, and composited it with the main video feed,
to give it a solid background. (The only reason the other
TOP is feeding into the "constant" was
to quickly make it automatically have the same
resolution.)
A "movie file out" TOP serves as the method for
recording output.
As I went through the process of creating the patch, exporting
the video file, taking screenshots, and writing this post, I
observed that the actual patching was only about 25% of the
total time that went into making this post. Since it's my
first post, I will probably be able to do the rest a little
more quickly, and I'm on semi-vacation so I should have more
time for actual TouchDesigner noodling and troubleshooting.
But I think this is actually a good microcosmic example of how
making art works: if you want to document and share your
process and make it legible to others in some way, it often
requires a significant time commitment. But at the same time,
it also helps me learn by having to explain what I'm
doing, and it could be of benefit to future me as well.
Anyway, when I have more time on the patching side of things,
I hope to figure out how to send the noise CHOP outputs to my
eurorack audio interface so that I can make a sound component
that follows the same modulation source as the colors. But at
first glance, I wasn't able to figure out how to do
multichannel output yet. (I didn't even know how to record to
a video file until just now!)
If anyone wants to play around with the patch, you can
download the TouchDesigner file below. (It should work with
the free version since it's set to a small resolution.)
TouchDesigner
is a node-based software for creating interactive media
systems, including image processing and generation, 3D
modeling, and some audio and data processing, mostly
geared towards live and realtime applications
↩︎
CHOP is short for Channel Operator, which is basically
how TouchDesigner refers to processing nodes related to
audio, or anything that resembles an audio stream (like
an LFO)
↩︎
Texture Operator, a.k.a. TOP, is basically how
TouchDesigner refers to processing nodes related to
video streams
↩︎
Day 2: Sphere
July 7, 2026
Second day patch! This is a weird one, and it isn't really
what I set out to do... But then, I don't really know what I
was trying to do anyway. I definitely figured out some more
quirks of TouchDesigner. The aesthetic result is...
questionable? IDK, it looks like this:
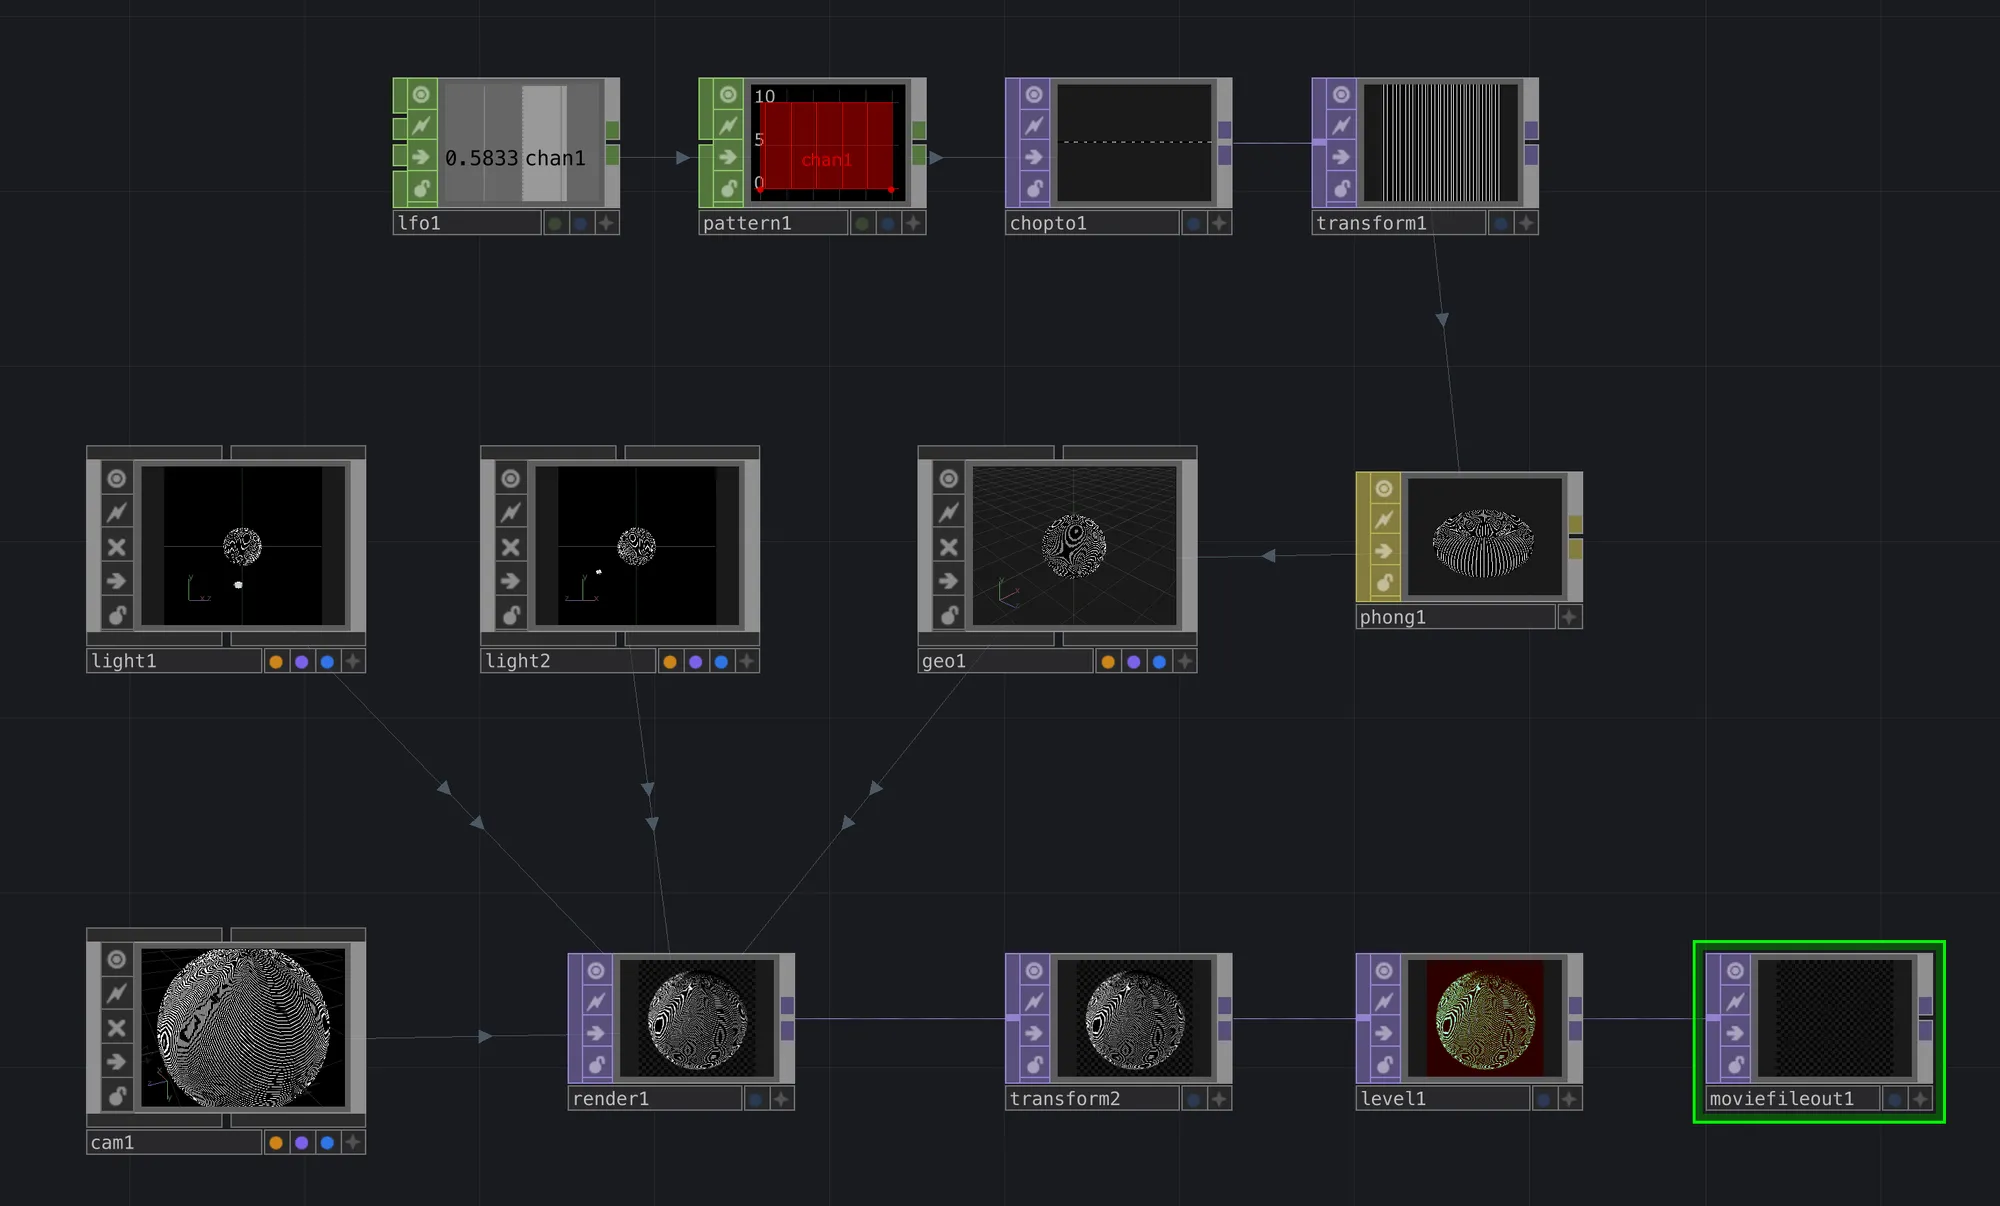
A screenshot of the patch:
This one uses an actual 3D scene, a very simple one with just
a floating sphere, two lights, and a camera. The phong
material applied to the sphere has a texture that is being
generated by a pulse wave, with the phase being animated, so
it looks like a slowly scrolling series of vertical lines. The
pulse wave is set to a high frequency, so the stripes are
dense and numerous — but the resolution on the
"render" TOP is set to pretty low (180 x 180
pixels), so those stripes are getting aliased to hell. That
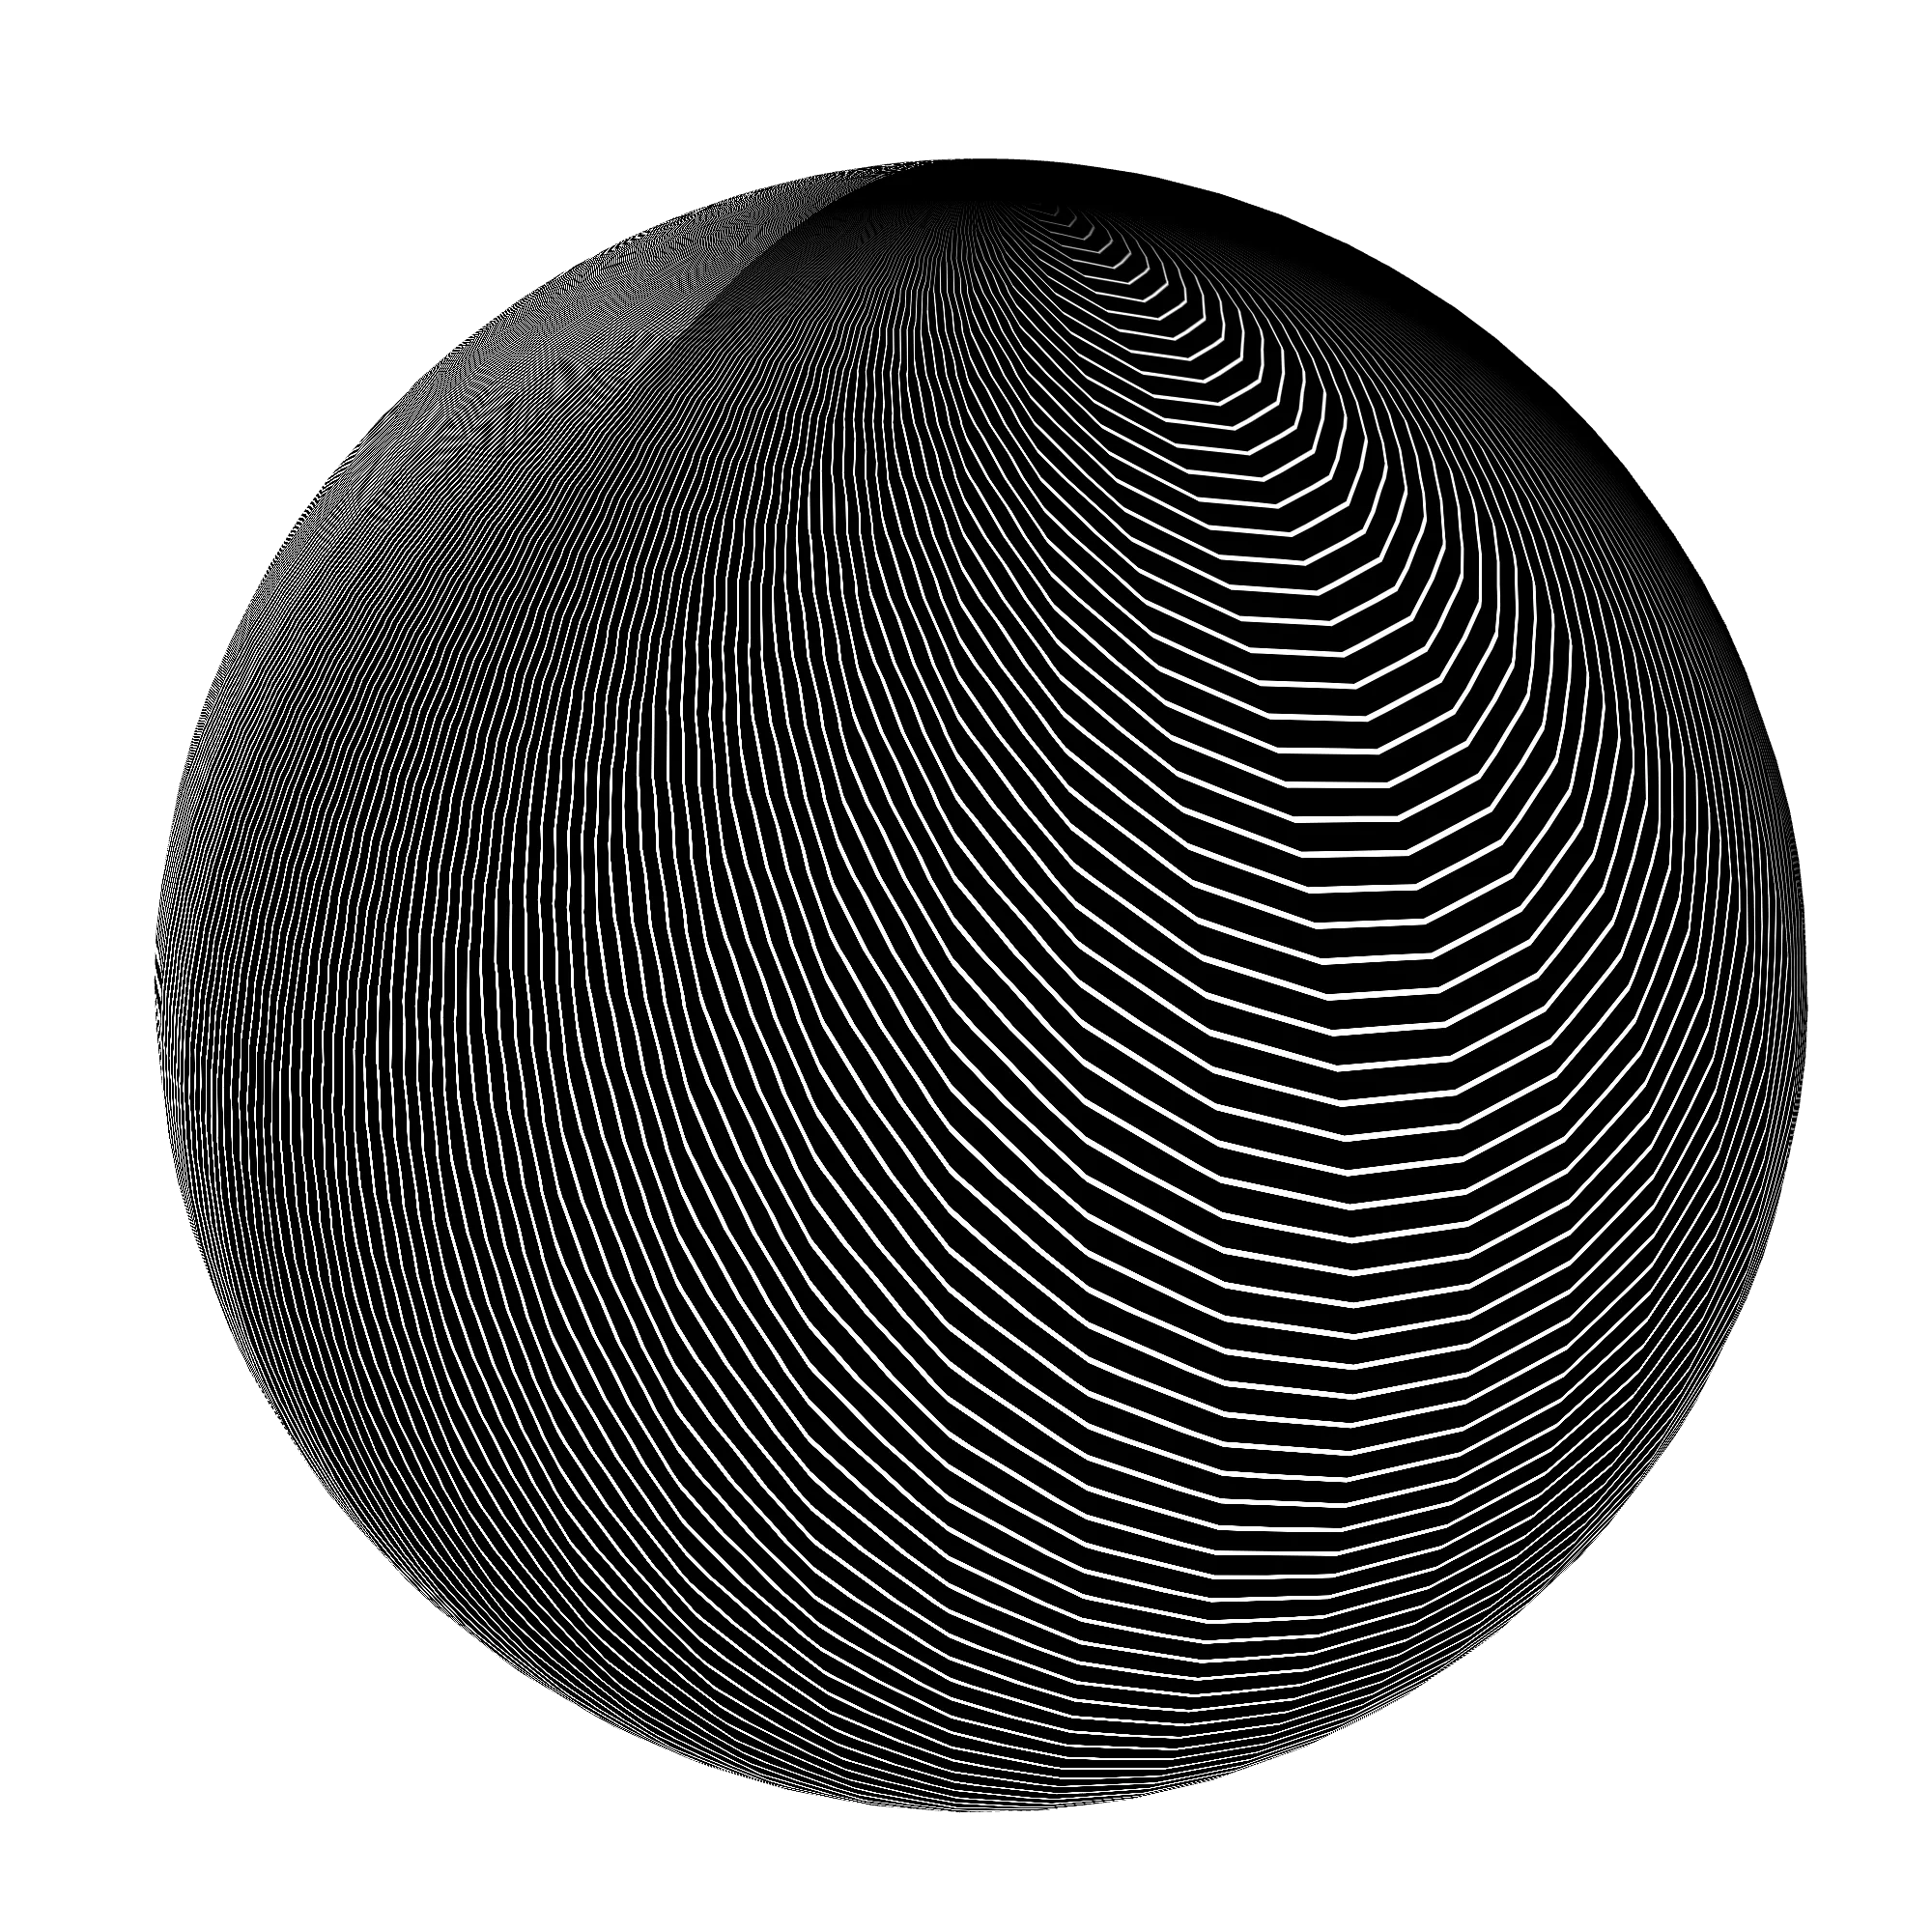
aliasing is what is creating the moiré patterns. Plus the
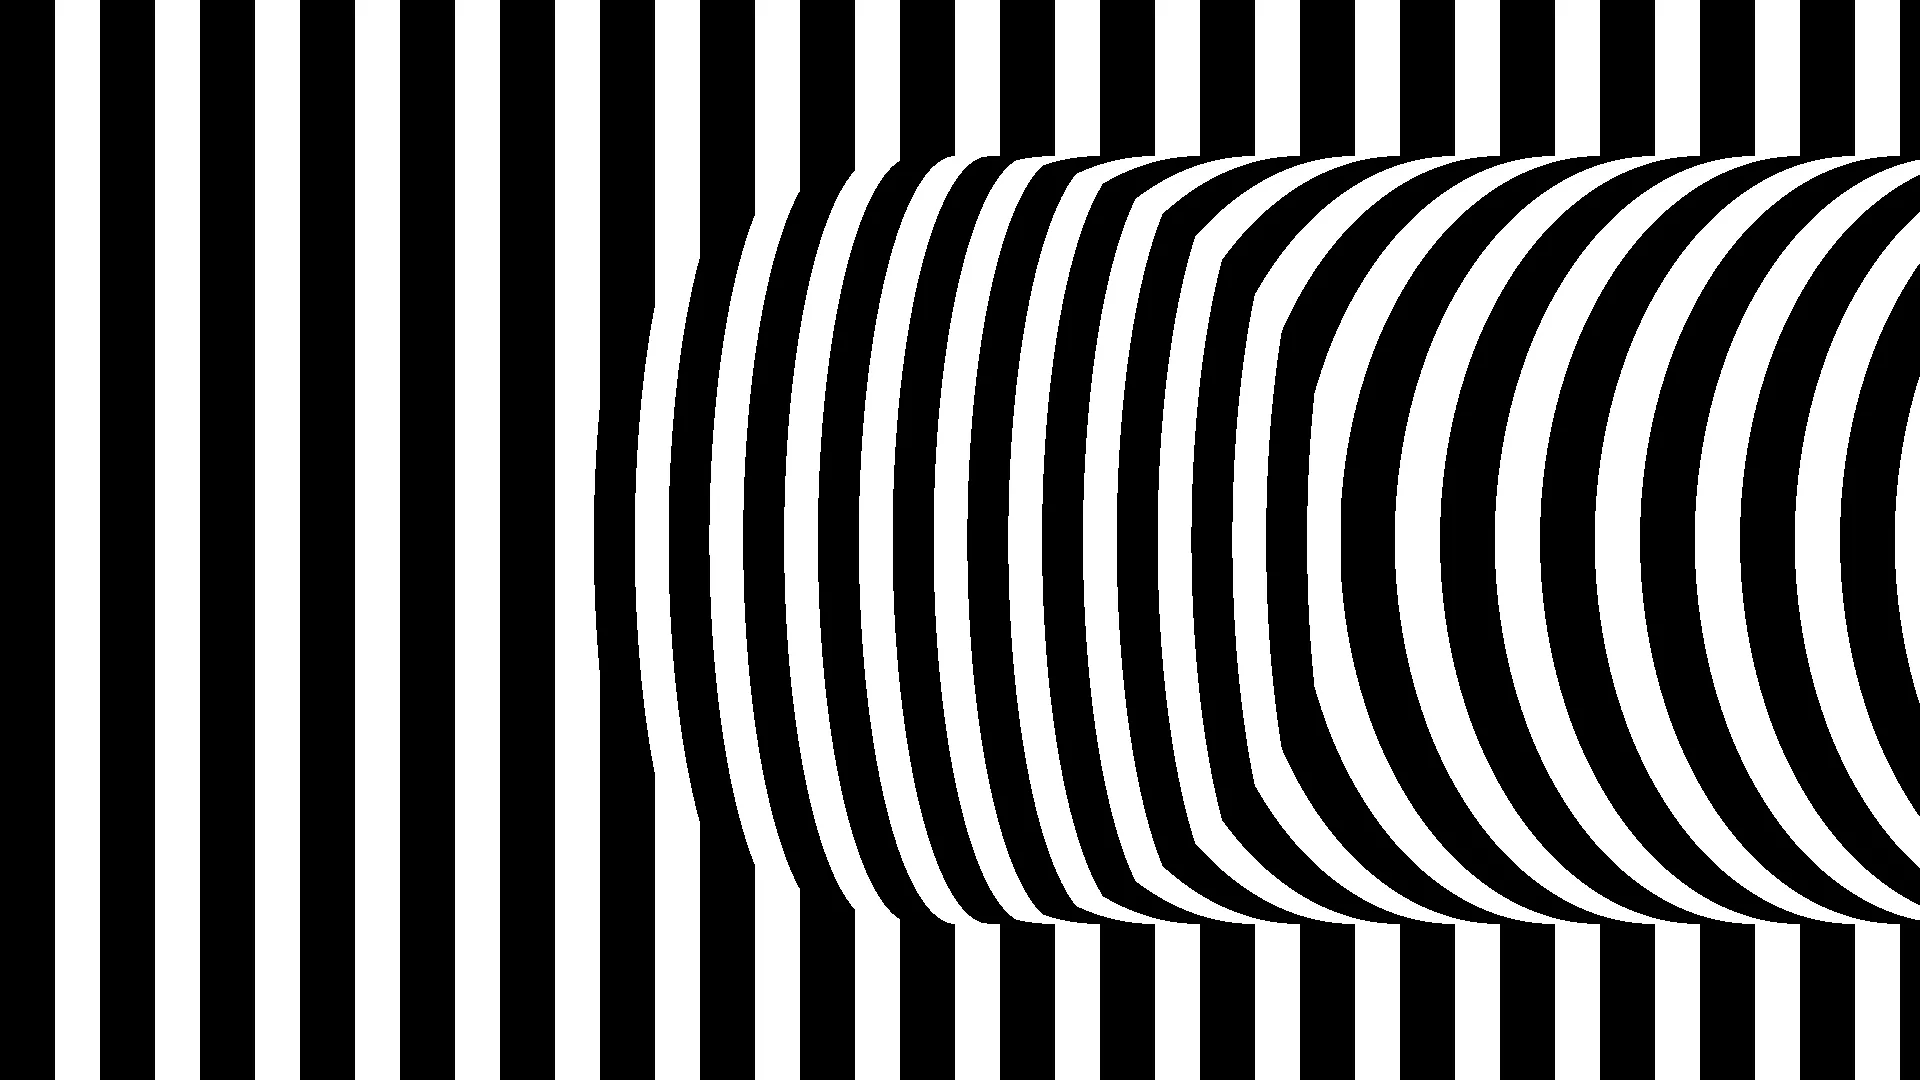
texture mapping on the sphere is "equidistant
azimuth" mode, so without the aliasing, it actually looks
like this:
Weird, right? At some point in the process, I also tried
animating the resolution with an LFO, but animating the phase
of the pulse wave produced smoother movement, so I went with
that. Not sure I'd do this exact thing again, but I work for
an art studio that makes op art with lots of dense, skinny
lines, and I am constantly fascinated by the patterns they
produce in the scaled-down thumbnail images. I always wondered
if I could do something with that idea. The result is that I
guess I can, but it looks very strange, and the visible
upscaling artifacts / crunchiness is hard for me to embrace
aesthetically.
Anyway, I'm out of time for today. Looking forward to seeing
what else happens, now that I kind of know how to use this
program better!
Here is the TouchDesigner file if anyone wants to play with
it:
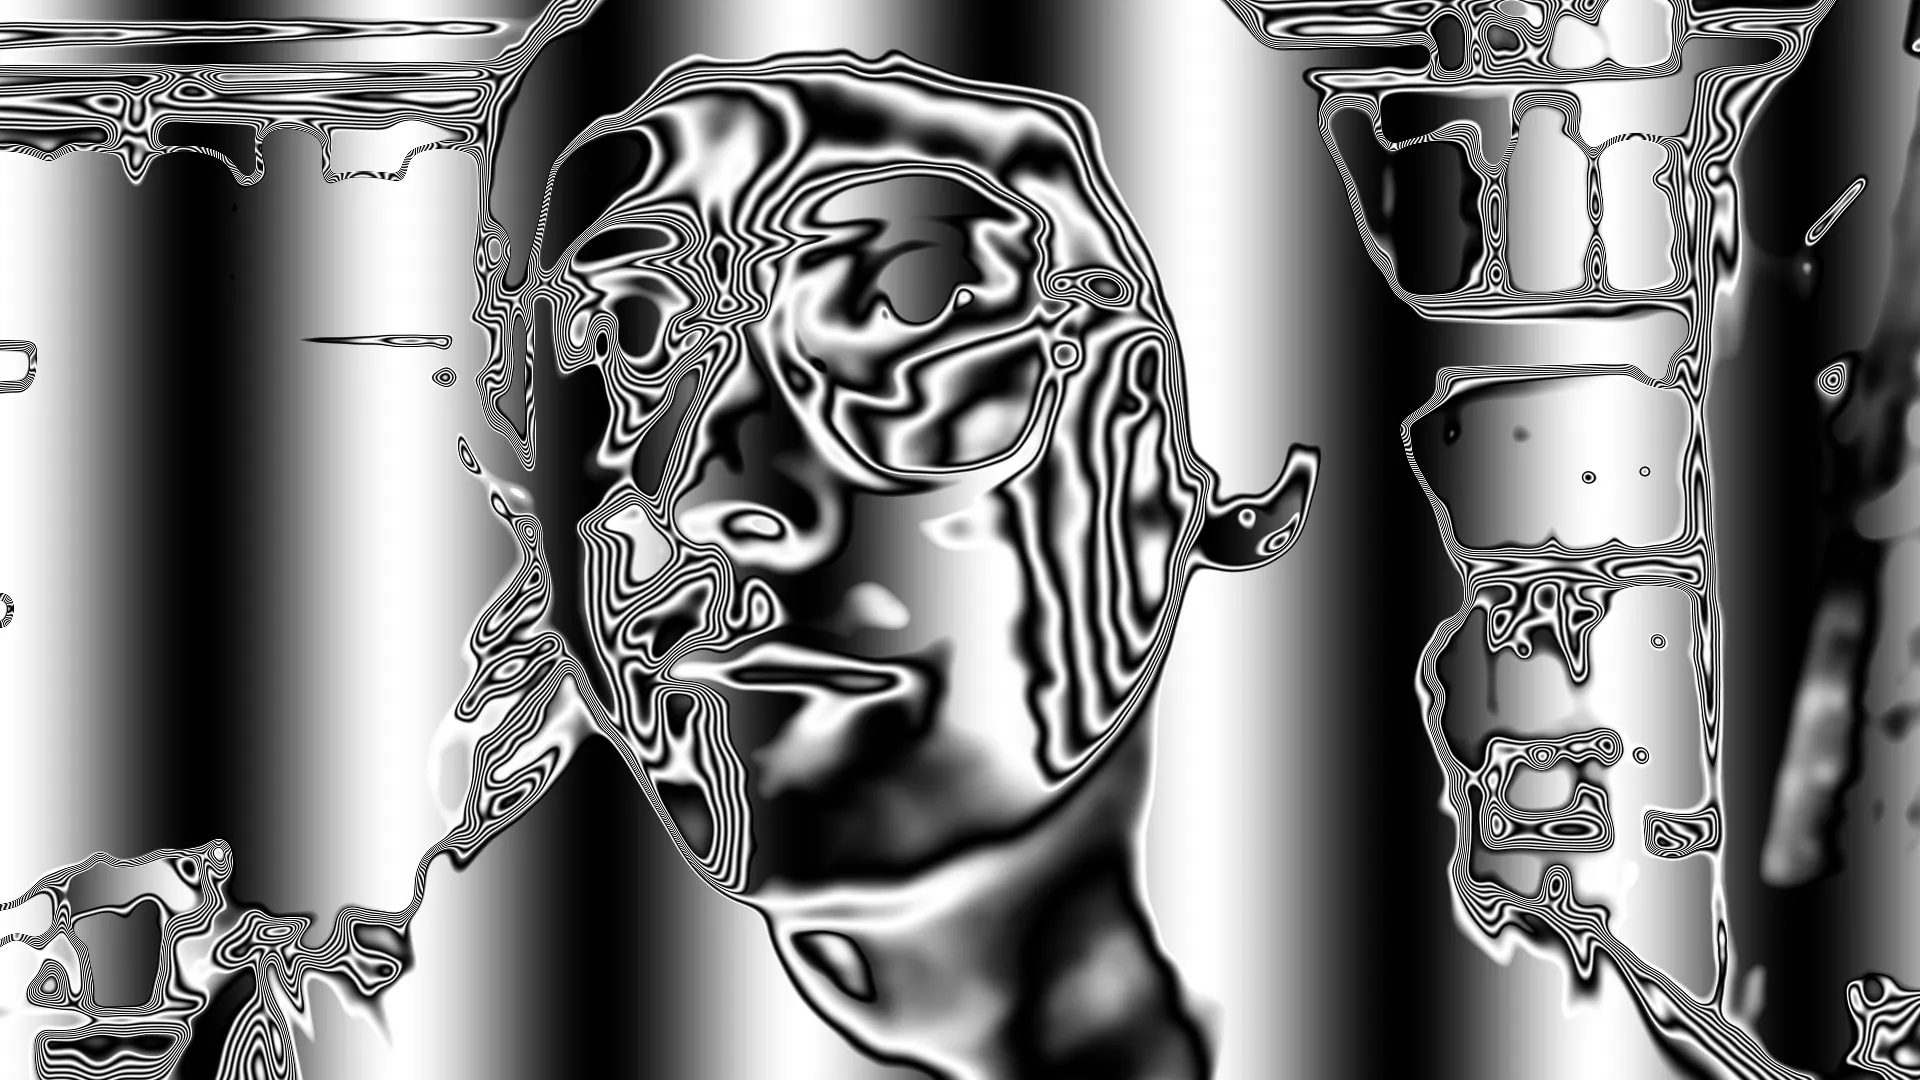
Here's my patch for Week of Patching day 3! This one combines
a simple reaction diffusion system with an orb (clearly one of
my favorite shapes).
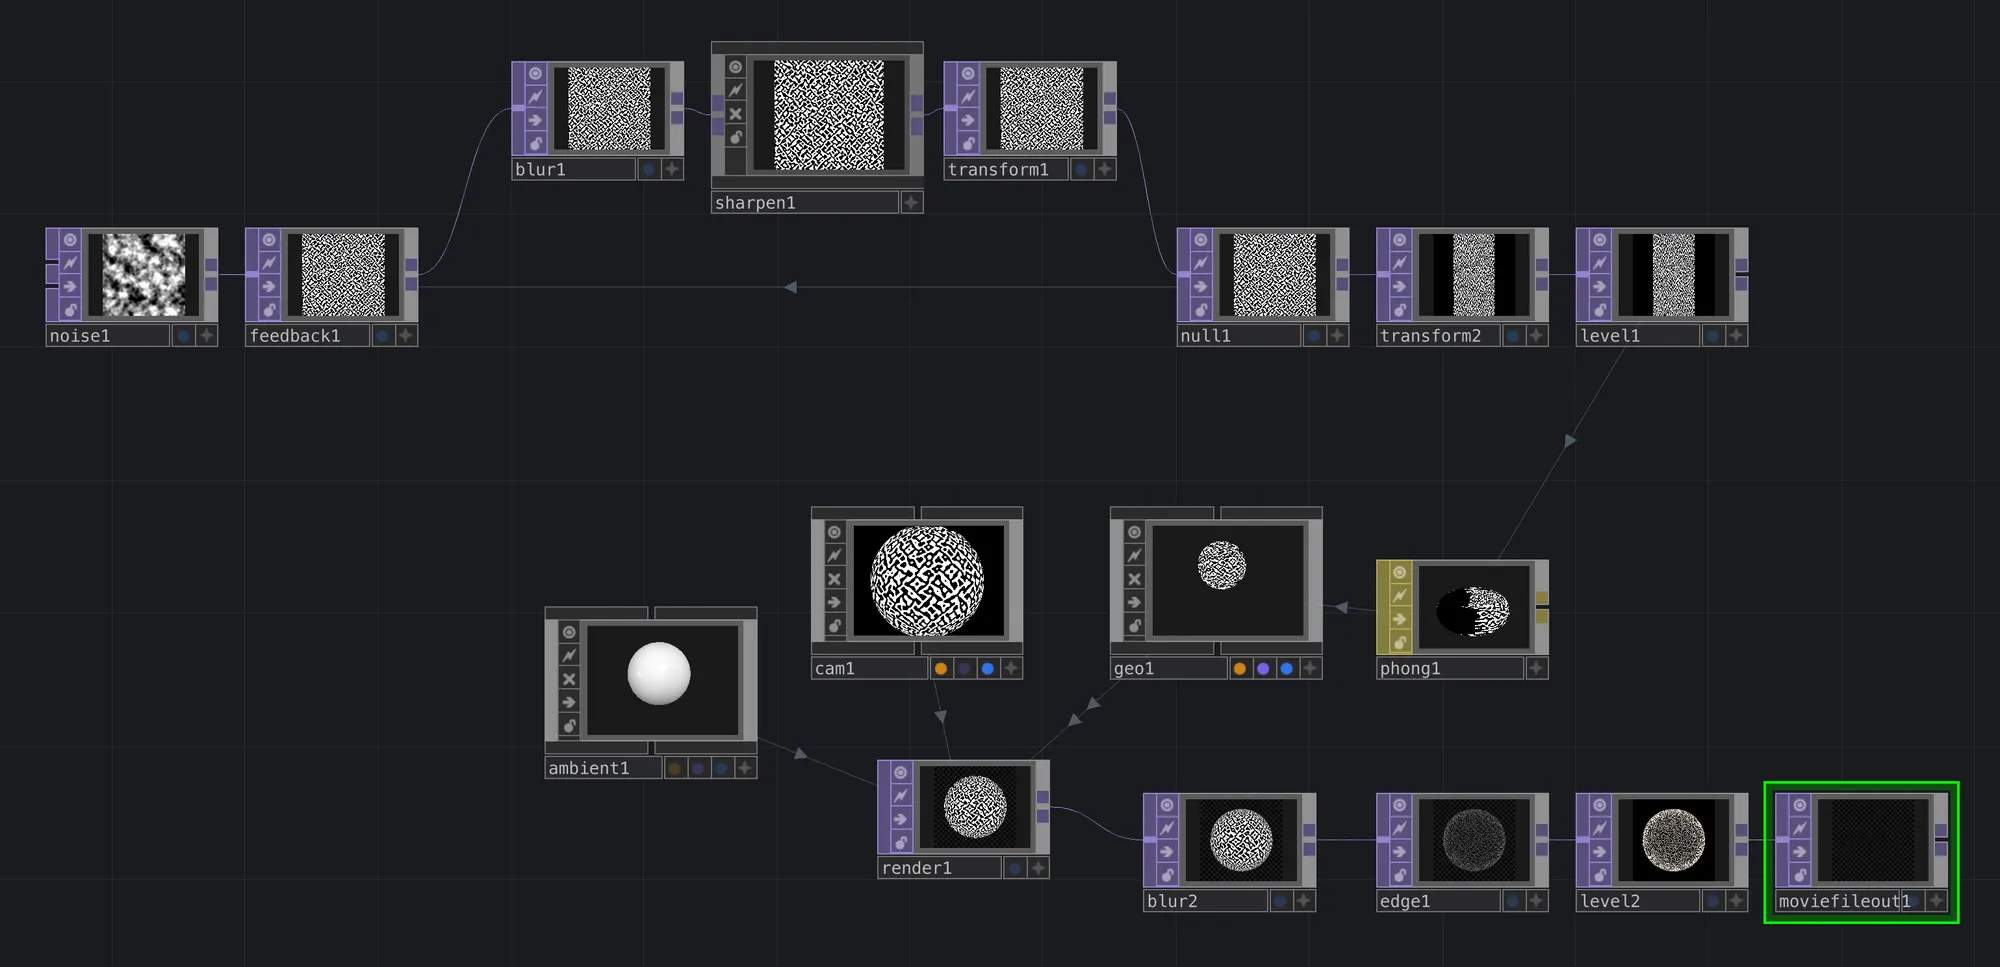
A screenshot of the patch:
The top half is the reaction diffusion system and a bit of
processing. It uses noise as a seed for a feedback loop, with
a blur, sharpen[1], and transform within the loop part of the chain. blur and
sharpen are the minimum to get reaction diffusion system; the
transform introduces a tiny bit of movement (scale up and
rotation) to keep the pattern from settling into a static
image.
At the end of that chain, I scaled the whole image to 50%
width because that seemed to be the best for mapping it to the
texture of the sphere.
After the sphere is rendered, I used an "edge" TOP
to grab the outlines of the pattern. I liked the look of the
pattern as a set of contours rather than solid black and white
shapes. The blur and level are just there to tweak the texture
and quality of the resulting imagery.
I realized while clipping the file afterwards that I was
dropping a lot of frames. Makes sense, as I had the render
section scaled way up so that I could antialias later by
downscaling. Might have overdone it though. Also, the whole
thing is sped up. I probably should have tweaked the
resolution of both the 3D render and the texture generation
for a more balanced approach. Oh well, apologies in advance if
you open the patch file and it lags like hell:
Sharpen is not a built-in node type in TouchDesigner,
but it's available as one of the default image
processing components.
↩︎
Day 4: Pseudo Rutt Etra
July 9, 2026
After feeling like I had gotten the hang of TouchDesigner
more, I got excited and started having some ideas of things I
wanted to try (instead of the other way around, noodling
around and letting the results be determined by whatever ended
up happening). I ran into the same situation I have in the
past, which is that TouchDesigner is a very difficult program
to learn this way. It seems that most people learn by seeing a
lot of examples of how other people have implemented things,
before they begin to build from scratch more. Well, as someone
who often tries to build things from scratch — partly because
I have Ideas of things to try based on my experience with
other systems, and I don't see any examples of how to do them
— I find this frustrating.
I really wanted to find a way to map brightness to depth, so I
tried making a few things on my own using the "grid"
SOP and some of the new POP operators, and almost got
things to a point of being cool, but then I dragged something
into something else that froze things and had to kill the
app... only after which I realized I hadn't saved. This
happened several times.
So I set my ego aside and searched for some tutorials that
might at least get at parts of what I wanted to do, such as
converting an image to a grid in 3D space, etc. I ended up
finding
this Pseudo Rutt Etra tutorial video
by a person called "lateness," which I liked because
it is actually pretty straightforward, unlike some others on
similar topics. And they explained at least some of what they
were doing, and I was able to replicate the results (at least
until I diverged at the end of the chain to add my own color
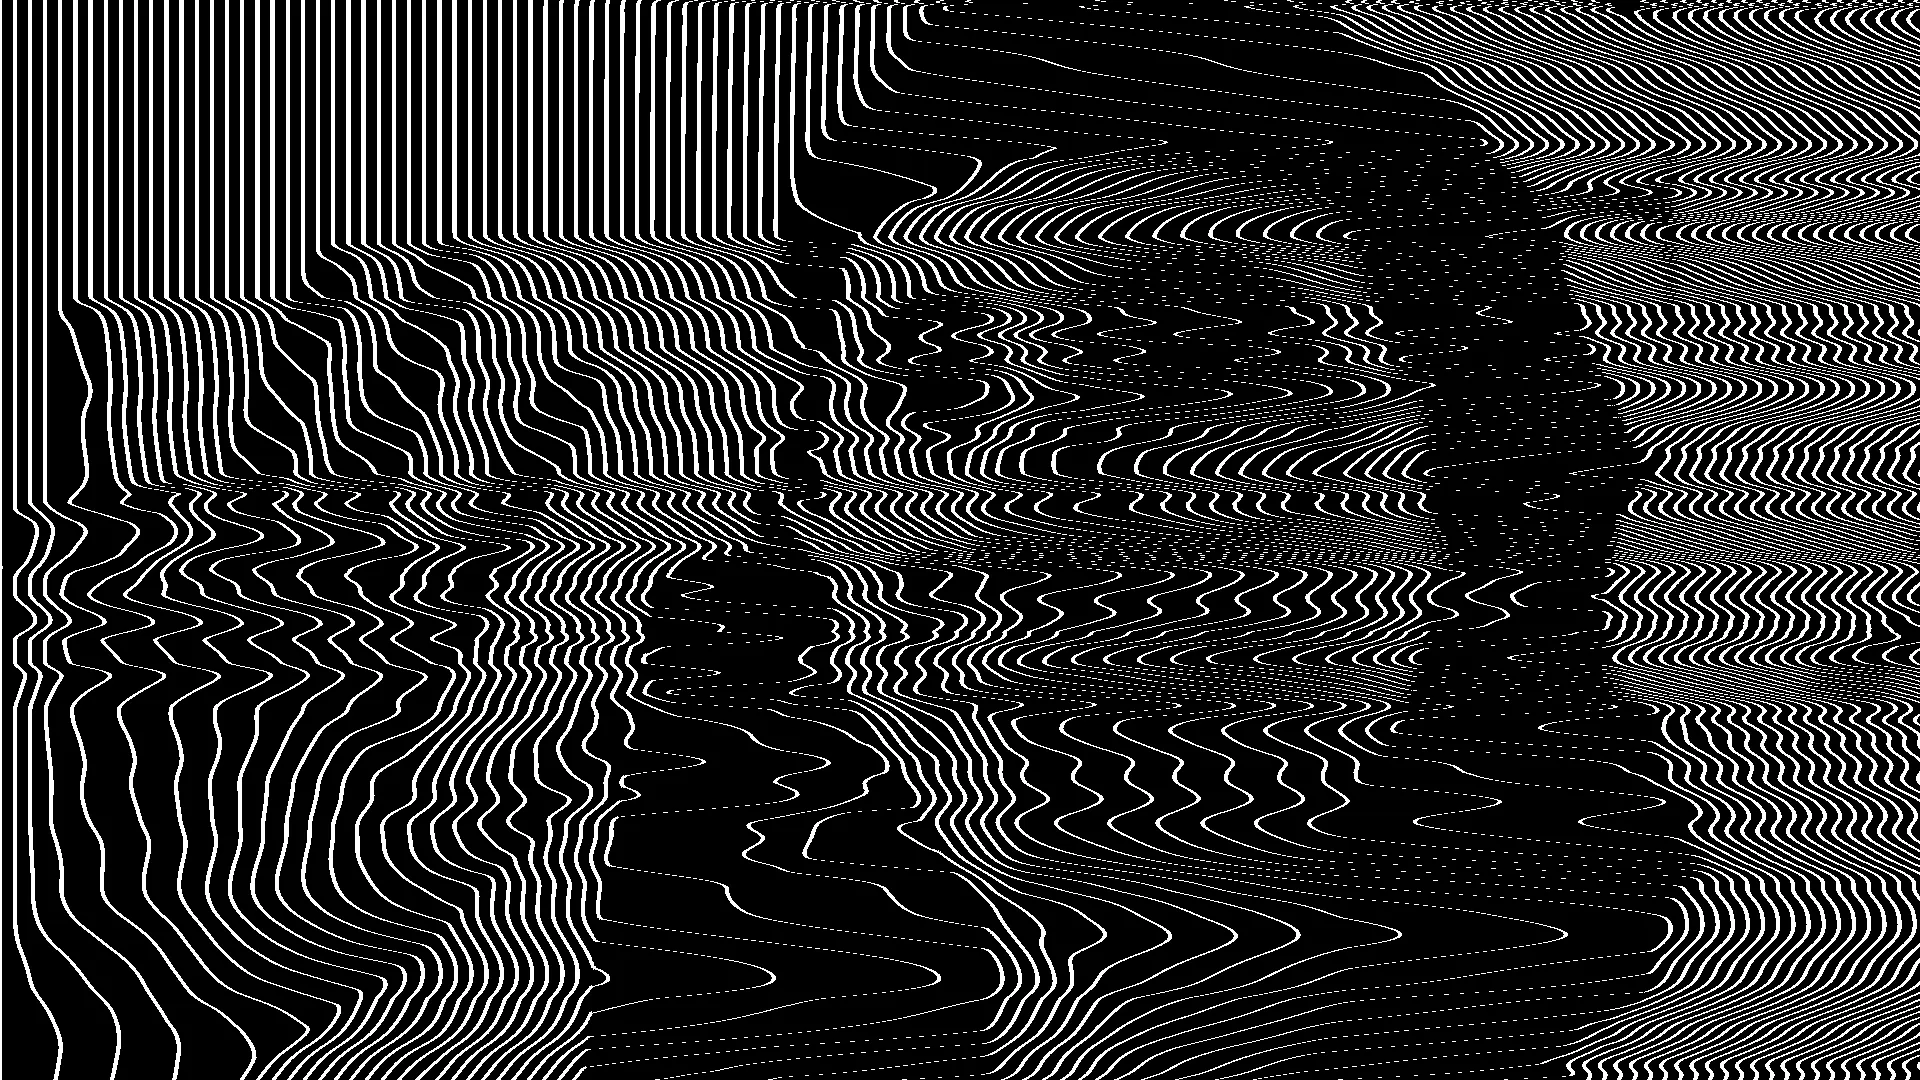
scheme). Here is a video of the output:
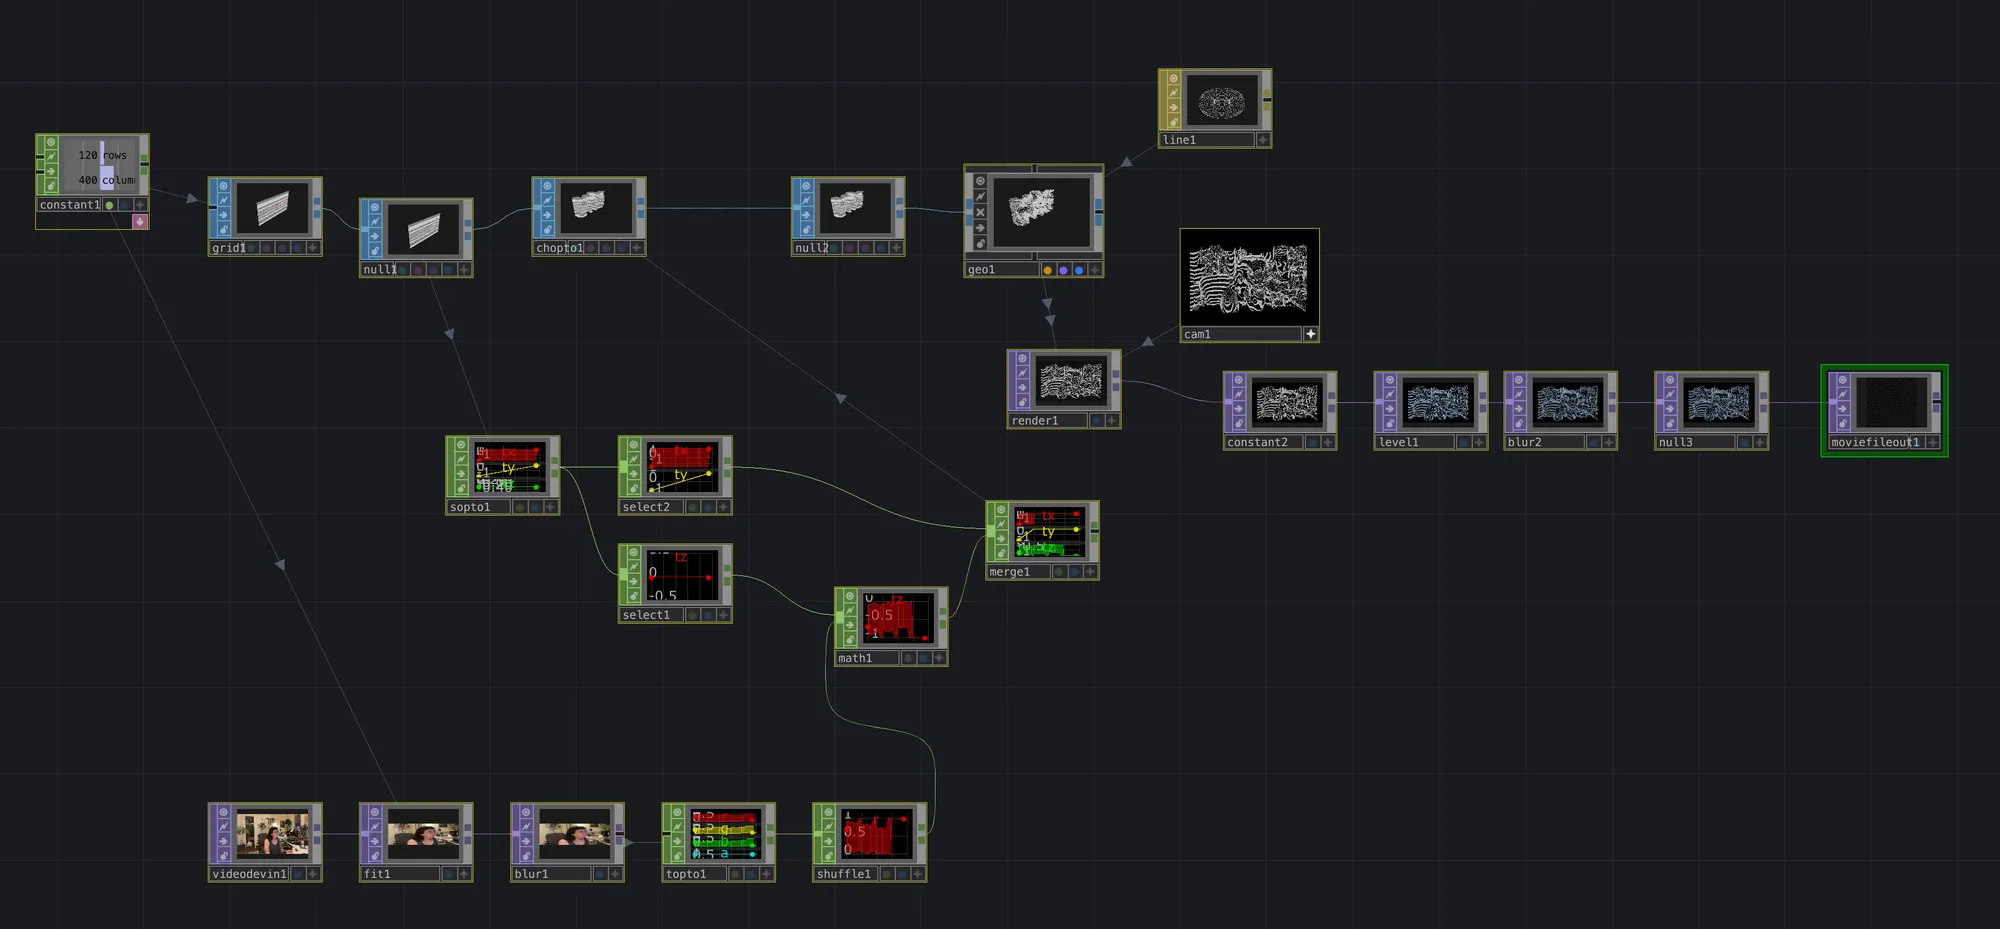
And a screenshot of the patch:
The main patch is driven by a grid, with its x and y units set
by a "constant" CHOP, allowing you to change the
numbers later and have it propagate to both a "grid"
SOP (3D shape) and a texture which is scaled to have 1 pixel
per grid unit. At this point, a bunch of stuff happens that I
would not have known how to do, such as converting both the
shape and the image to CHOPs (channel operators), splitting
apart the X, Y, and Z coordinate sets, adding the pixel values
as a Z offset, and then converting back to a shape.
Since it's now 10pm, the result of this tutorial will have to
be my patching entry for today. I had to work today, but I
have the rest of the days of Week of Patching off, so
hopefully I will have more time to make some things from
scratch soon using what I've learned!
In lieu of sharing the patch file, I suggest building it
yourself from
lateness's video. I want to watch their other two videos soon also, they both
look interesting, and useful for my goals.
Day 5: Variations
July 11, 2026
I'm a little behind on posting these, but I'm not behind on
patching! It's just taking me a little bit longer to translate
my patching activities into documentation and posts. Sometimes
I get lost in noodling around. Which I think is a good thing.
So for this post, I have four different videos that are all
variations of patches I made already, to varying degrees. For
that reason, I haven't included patch screenshots or files.
But I'll explain what I changed for each one. Note: the first
three are all inspired by hardware I used to create my
Signal Culture Series, so check those out to compare similar effects created with
hardware.
Pseudo Rutt Etra v2
The first one is a variation on the Pseudo Rutt Etra.
I'm a little more comfortable calling this my own work,
because while vestiges of the tutorial version remain, I've
figured out how to do some things that I like to do with
hardware scan processing.
The main change here was to actually be able to apply the
brightness of the source image to the lines. In order to
achieve that, I had to switch the "MAT" (3D
material) from "lines" to one that supports a color
map. I chose a "constant" MAT, and applied the color
map of the source texture to it. Since the lines formed by
this MAT were much thinner and dimmer, I also had to use some
image processing steps to boost them (mainly "blur"
and "levels"). I also added a bloom to simulate the
effect of a phosphorescent screen. I hope you will forgive me
that affectation!
Also, I masked the image with a circle. Since the lines have
the color of the input now, that allows the edges to drop away
into darkness. Like many signals you can input into this kind
of system, it benefits from a little blurring before it gets
scan processed. Here is the result:
Wobbulator
After I felt reasonably successful in replicating some of my
favorite techniques in scan processing, I realized I could
emulate a Wobbulator (a kind of modified CRT) with the same
technique. I kept a bit of the brightness displacement
enabled, and I also added "pattern" CHOPs
(oscillators) and LFOs to modulate the position of the
scanlines in an additional way. It took some fiddling to get
the oscillators to sync nicely with the "scan rate,"
but I figured it out. Here is the result of that:
I still haven't figured out how to emulate the
"S-curve" modulation mode of the real Wobbulator I
used. I might need to do some matrix multiplication? Will
think more on this.
Ribbons
This is my final scan-processing (a.k.a. Rutt Etra[1]) inspired patch. Another technique I experimented with at
Signal Culture was manipulating a blank video signal to create
warped, abstract forms. I used more "patterns" to
modulate not just the Z, but also the X and Y positions. One
of these is being modulated by a simple sine wave; the other
is a combination of sine and cosine to create a curl:
Colors Fading
This is a variation on the Colors Panning patch from
Day 1. I changed the modulation on the noise from X to Z, so
the colors appear to fade in and out, instead of moving
horizontally. I like this version a little bit better. I
especially like the vibrancy of the colors and the spectral
effect that sometimes emerges:
That's all I'm prepared to share right now, but I have some
more patches in the works that I will try to document soon and
add to this log.
Fun fact: Rutt and Etra were not the only ones to
develop a scan-processing device, but their names became
synonymous with the effect. Similar devices included the
Scanimate (used in commercial motion design for
television) and the Raster Scan by Dave Jones (which is
what I used at Signal Culture).
↩︎
Conclusions
July 13, 2026
Week of Patching technically ended yesterday. I posted 5 log
entries (out of an aspirational 7), which involved patching
(of course), but also: recording videos, sharing screenshots
and TouchDesigner files, writing explanations about what I
did, making this webpage, etc. At the end of the week, I
started getting deeper into the patching process, spending
more time making more complex patches with reusable
components... And I ran short on time for the "record and
document" stage. I have more patches that I want to
document, but it's going to take me more time, and I think
they should probably get their own pages/posts rather than
getting appended to the bottom of this page. So I'll wrap up
this log by writing down some of my conclusions and
observations.
Things Take a Long Time
I kind of touched on this at the beginning, but sometimes I
find it easy to underestimate how long something will take. I
might plan to patch for an hour, and then spend another 20 or
so minutes on the sharing aspect. I begin patching, and next
thing I know, it's time to eat dinner, and then I'm hastily
writing up my notes before bed. Maybe it's not just how long
these kinds of things take, but also how
engrossing they can be. I still think that, at least
for some things, the writing and sharing part is important,
and can be enriching both to me and the people who read it. I
am a big fan of "working with the garage door up,"
and while my participation in online spaces fluctuates, I try
to continue to abide by the principle of openness.
Community is Awesome
This may seem obvious/cliché, but doing things in community is
often better than doing them alone. Seeing what other people
made throughout the week was very exciting for me, and it also
fueled my own motivation to patch and share. Most of the other
people patching were using audio synths, but one other person
was working with visuals, and several people were using tools
that they created themselves. One person did a mashup between
Week of Patching and Old Computer Challenge. I'm not sure
exactly how many people participated, but my estimate is about
10. If you haven't already done so, be sure to check out the
#weekOfPatching
hashtag on the Fediverse.
The Fediverse may be small and niche, but there's a high
concentration of people who actually do things.
People are, in my experience, a bit less passive than other
platforms (besides, perhaps, dedicated forum spaces). Also,
people seem to enjoy sharing their process, in a high level of
technical detail. That makes me feel at home. People have made
some valid critiques of it as a social platform, but I haven't
felt so at home in any other online space in quite a while,
and I greatly appreciate the people who surround me on it.
A Week is More Realistic Than a Month For Me
A few years ago, I tried to do another self-imposed challenge
called
Experiments in Public. That one was supposed to run for a month; I completed less
than half of it, despite it being my main focus at the time.
Now, my life is overall more busy, but I was on semi-vacation
(I had to work for two days during the week). I thought 7 days
would be easier, but it was still pretty hard — but I
almost made it.
It's good for it to be a little bit of a stretch; or else it
wouldn't be a "challenge," right? I see these things
like "looptober," and I think about how hard that
would be for me. I don't seem to be able to do creative
projects "a little each day" — I have to do them for
30 hours in one week rather than 1 hour per day for a month. I
wish I could be more like the latter, and I've tried that, but
I guess by now I've figured out some things about my brain and
stuff. It's always good to feel pressured by an artificial
deadline, but not too pressured, and I think this hit
that middle ground for me.
Maybe We Should Do This Again
If my schedule allows me to organize and participate in this
again, I'd like to do so. If I do, I'll post on the Fediverse
with the #weekOfPatching hashtag.
Thanks everyone who joined for making this such a fun and
exciting experience! Finally, here are a few small previews of
some of my yet-undocumented patches: